A plugin is a software component that adds specific features and functionalities to your website.
In this article, let’s explore the process of installing plugins, including the benefits and how-to steps.
Here I will explain three different methods for installing a plugin in WordPress.
Installing a plugin directly from the dashboard is usually the simplest and most convenient method, as it allows you to search for and install plugins without leaving your WordPress site.
However, there may be cases where you need to install a plugin manually or via FTP.
To know Best WordPress Plugins Click Here!
Benefits of Installing WordPress Plugins
Installing plugins offers several benefits that can help you improve your website’s performance and user experience.
Here are some benefits of using plugins:
Enhanced Functionality
Plugins offer a wide range of features and functionalities that are not available in the default WordPress installation.
With plugins, you can add new features to your website, such as contact forms, social media sharing,
e-commerce, and more.
Improved Performance
Plugins can help optimize your website’s performance by caching pages, compressing images, and minimizing scripts and stylesheets.
This results in faster page load times and better user experience.
Increased Security
Plugins can help enhance the security of your website by adding features such as two-factor authentication, malware scanning, and firewall protection.
These features help protect your website from hacking attempts and unauthorized access.
Search Engine Optimization (SEO)
Plugins can help improve your website’s search engine ranking by optimizing your content for search engines.
SEO plugins offer features such as keyword analysis, meta descriptions, and sitemaps.
How to Install WordPress Plugins
Installing plugins is a straightforward process that can be done in a few easy steps. Here’s how to install WordPress plugins:
Method 1- To add a plugin to your WordPress website from the dashboard:
1.Log in to your WordPress dashboard.
2.In the left-hand menu, hover over the “Plugins” option and click “Add New.”
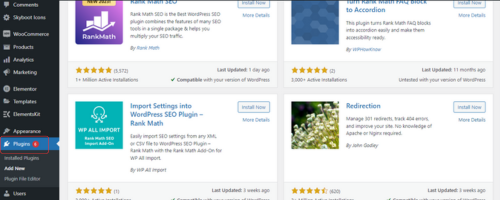
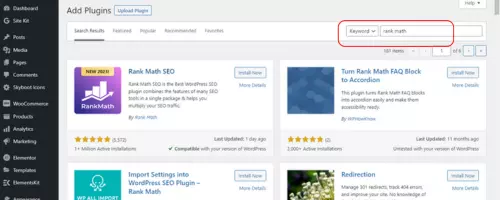
3.Here, you can search for the plugin you want to install using the search bar on the right-hand side. Here i am installing rank math plugin.
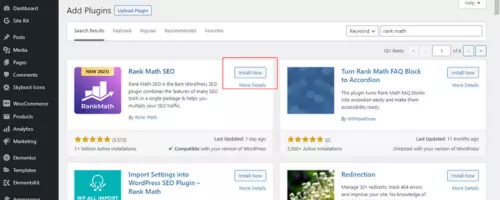
4.Once have found the plugin, click on the “Install Now” button.
5.WordPress will begin installing the plugin. When it’s finished, you’ll see a “Plugin installed successfully” message. At this point, you can either activate the plugin by clicking the “Activate Plugin” button, or return to the “Plugins” page to activate it later.
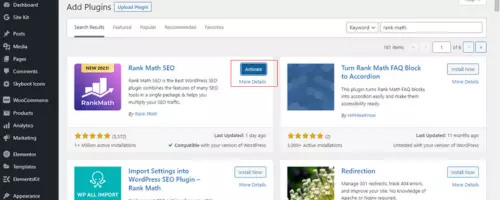
6.If you choose to activate the plugin later, you can do so by going to the “Plugins” page and finding the plugin you want to activate. Then, simply click the “Activate” button.
Method 2-To manually add a plugin to your WordPress website:
1.Download the plugin you want to install from a trusted source. The plugin should be in a .zip file format.
2.Log in to your dashboard.
3.In the left-hand menu, hover over the “Plugins” option and click “Add New.”
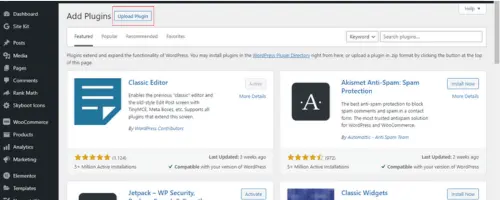
4.On the “Add Plugins” page, click the “Upload Plugin” button at the top.
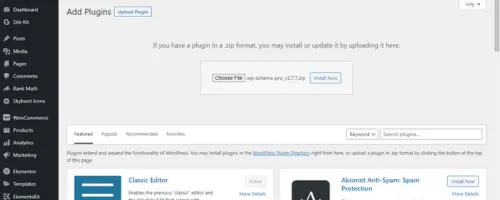
4.Click the “Choose File” button and select the .zip file you downloaded in step 1 and click “Install now”.
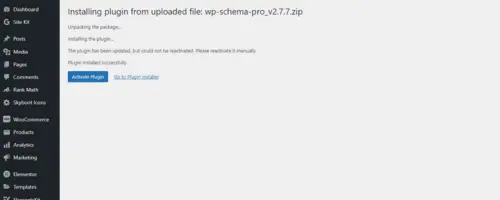
5. After the installation is complete, click Activate Plugin.
Method 3- To add a plugin to your WordPress website via FTP:
1.Download the plugin file from the official WordPress plugin repository or a third-party source.
2.Extract the downloaded zip file to your computer.
3.Connect to your website’s FTP server using an FTP client like FileZilla or Cyberduck. You will need to enter your website’s FTP credentials, which you can obtain from your web host.
4.Once you have connected to your website’s FTP server, navigate to the wp-content/plugins directory.
5.In the Local site section of FileZilla, find the plugin folder on your local computer.
6.Drag and drop the plugin folder from the Local site section to the Remote site section or Upload the extracted plugin folder to the plugins directory. Make sure you upload the entire plugin folder and not just the plugin file.
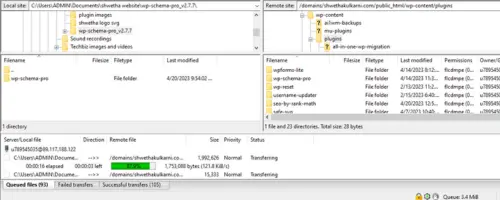
7.After the upload is complete, log in to your dashboard.
8.Click on “Plugins” in the left-hand menu.
9.You should see the newly added plugin in the list. Click the “Activate” button next to the plugin to activate it.
That’s it! You’ve successfully added a plugin to your website with all three different methods.
Activating and deactivating plugins
Once you have installed a plugin, you can activate or deactivate it at any time. Here’s how:
- Login to your dashboard and click on “Plugins” in the sidebar.
- Locate the plugin you want to activate or deactivate and click on “Activate” or “Deactivate” respectively.
Updating plugins
It’s important to keep your plugins updated to ensure compatibility and security. Here’s how to update a plugin:
- Login to your dashboard and click on “Plugins” in the sidebar.
- Locate the plugin that needs an update and click on “Update Now.”
Common plugin issues and how to troubleshoot them
Plugins can sometimes cause issues with your website, such as slow loading times or compatibility issues. Here are some common issues and how to troubleshoot them:
- Plugin conflicts: If two or more plugins are conflicting with each other, try disabling one of them to see if the issue is resolved.
- Slow loading times: Some plugins can slow down your website’s loading times. Try disabling plugins that you’re not using to see if it improves loading times.
- Compatibility issues: If a plugin is not compatible with your current WordPress version or with another plugin you’re using, try finding an alternative plugin that offers the same functionality.
Best practices for plugin management
Here are some best practices to keep in mind when managing plugins on your site:
- Keep plugins updated: Always keep your plugins updated to ensure compatibility and security.
- Use reputable plugins: Only install plugins from reputable sources with good reviews and ratings.
- Limit the number of plugins: Using too many plugins can slow down your website and cause compatibility issues, so only use the plugins that are necessary for your site’s functionality.
- Regularly review plugins: Periodically review the plugins you have installed and deactivate or remove any that are no longer needed or causing issues.
FAQs About Installing WordPress Plugins
Here are some frequently asked questions about installing WordPress plugins:
What is a WordPress plugin?
A plugin is a software component that adds specific features and functionalities to your website. Plugins can be used to add new features, optimize performance, enhance security, and improve SEO.
How do I find a WordPress plugin?
You can find WordPress plugins in the WordPress repository, which offers a vast collection of free plugins. You can also search for premium plugins on third-party websites and purchase them from the developer.
How do I install a WordPress plugin?
To install a plugin, you can either install it from the WordPress repository or upload it manually to your website. Simply log in to your WordPress dashboard, click on “Plugins” and follow the instructions for installation.
Are WordPress plugins free?
Most WordPress plugins are free and can be found in the WordPress repository. However, some plugins may require payment for additional features or support.
Are WordPress plugins safe?
While most plugins are safe to use, some may contain vulnerabilities that can be exploited by hackers. Always check the reviews and ratings of a plugin before installing it, and make sure to keep your plugins updated.
Can I install multiple WordPress plugins?
Yes, you can install multiple plugins on your website. However, it’s important to make sure that the plugins are compatible with each other and with your version of WordPress.
Conclusion
Installing WordPress plugins is an easy and efficient way to enhance the functionality and performance of your website.
By following the steps outlined in this guide, you can install and use plugins to add new features, optimize performance, enhance security, and improve SEO.
Make sure to choose plugins that are safe, reliable, and compatible with your website, and always keep them updated for the best results.
Now I would love to hear from you.
Make yourself known by leaving a comment here. I look forward to your response and welcome any other ideas as they emerge!
To Know More Click Here!


