Are you ready to create a blog in WordPress and share your thoughts with the world?
WordPress is a great platform to get started. In this step-by-step tutorial, you will learn how to create a blog in WordPress.
Even if you are a beginner, you can follow these easy steps and create your own blog in no time.
Introduction
In today’s digital world, blogs are an important way to share ideas and connect with people.
WordPress is one of the most popular platforms to creating blogs and websites.
It is user-friendly and has a wide range of features.
In this tutorial, Let’s cover the basic steps for creating a blog in WordPress.
Preparations
Before you start creating your blog, you need to prepare a few things.
Domain name
Your domain name is the address of your blog.
It should be catchy, easy to remember, and relevant to your blog’s topic.
You can register a domain name with a domain registrar like GoDaddy, Namecheap, or Bluehost.
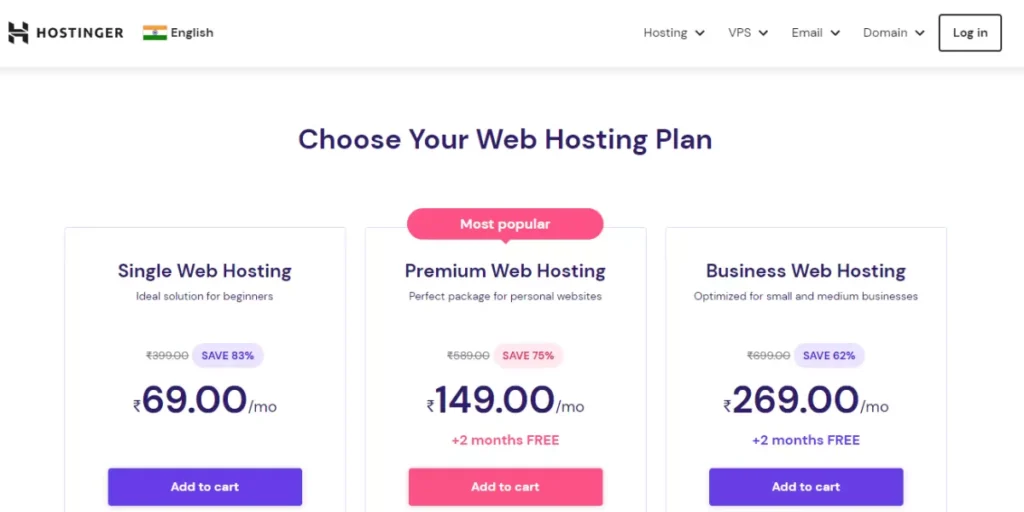
I got my web hosting plan from hostinger.
Hosting
Your hosting provider is where your blog will be stored.
You can choose a hosting provider like Bluehost, HostGator, or Hostinger.
You should choose a hosting plan that fits your needs and budget.
Installing WordPress
Once you have your domain name and hosting, you can install WordPress.
Most hosting providers offer a one-click installation for WordPress.
If not, you can download WordPress from their official website and upload it to your hosting provider.
Basic WordPress Dashboard Configuration
After installing WordPress, you need to configure some basic settings.
The WordPress dashboard serves as the control center for your website.
It’s the administrative area where you can manage various aspects of your site, such as creating and editing content, customizing the appearance, installing plugins, and configuring settings.
The WordPress dashboard is where you will manage your blog.
It has all the tools you need to create, manage, and publish your content.
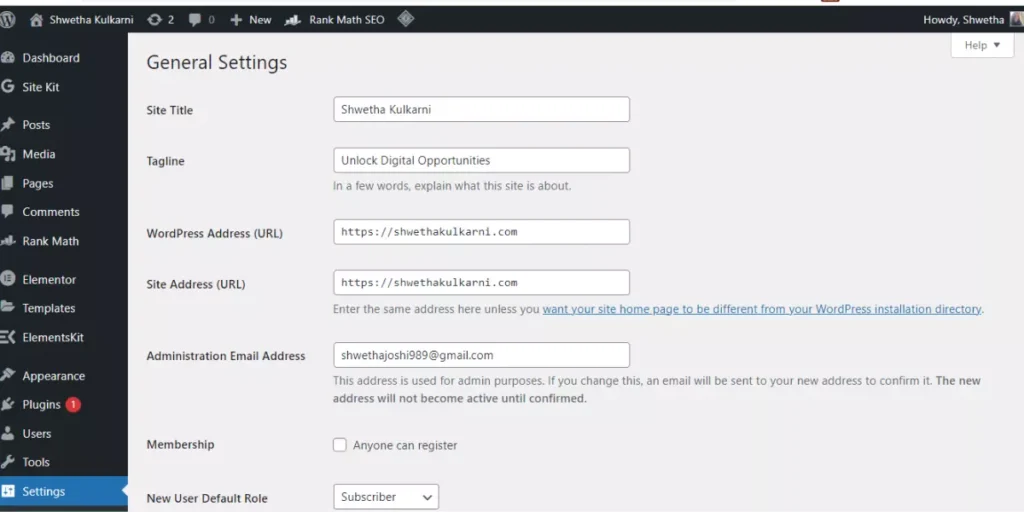
General Settings
In the General Settings, you can configure your blog’s title, tagline, and timezone.
You can also set up your email address and change your site’s language.
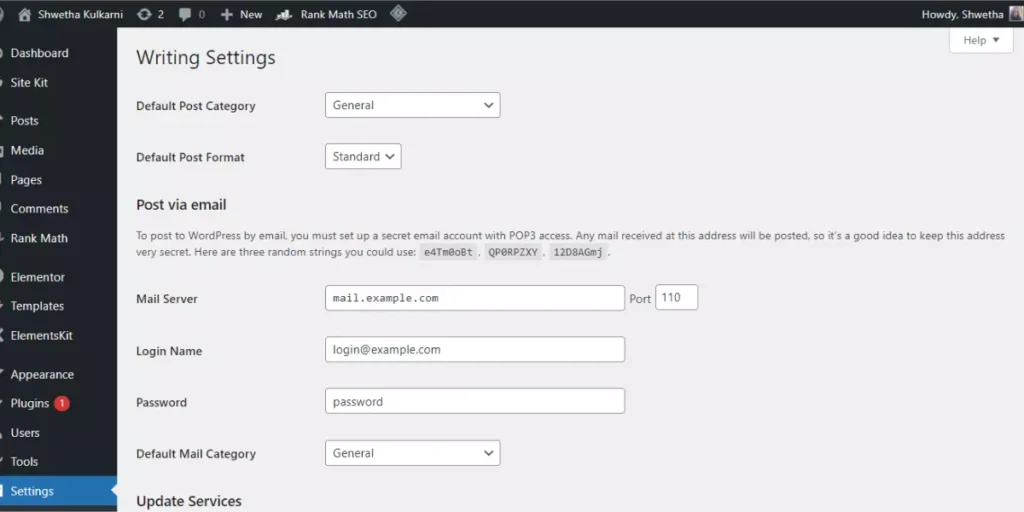
Writing Settings
In the Writing Settings, you can configure the default category and post format.
You can also enable or disable post via email and remote publishing.
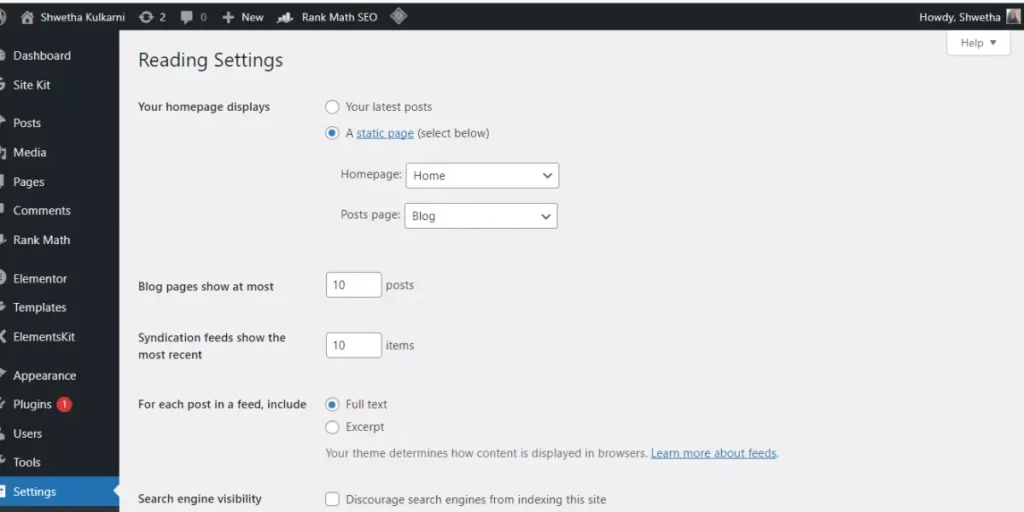
Reading Settings
In the Reading Settings, you can configure your blog’s homepage, post page, and feed.
You can also set the number of posts to display on each page.
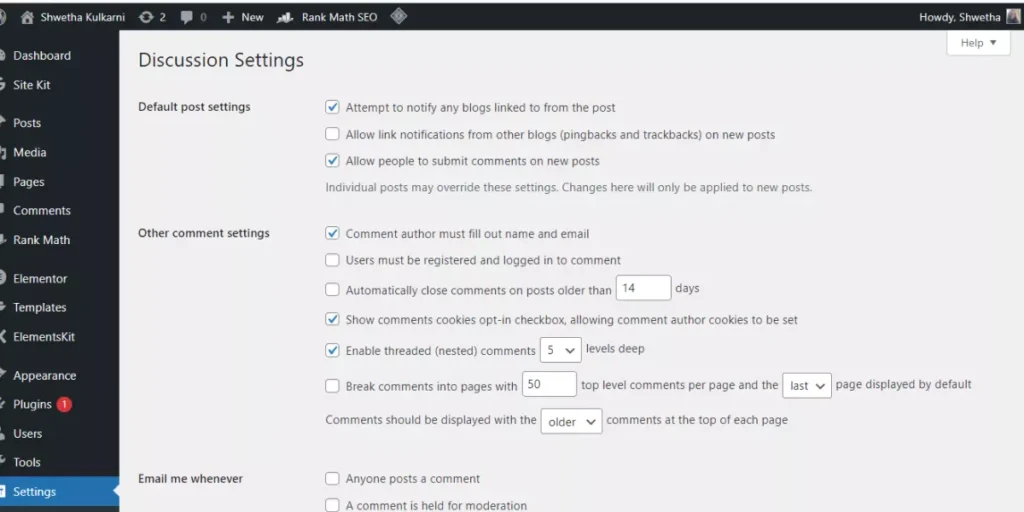
Discussion Settings
In the Discussion Settings, you can configure the comments and trackbacks on your blog.
You can also set up comment moderation and blacklist certain words.
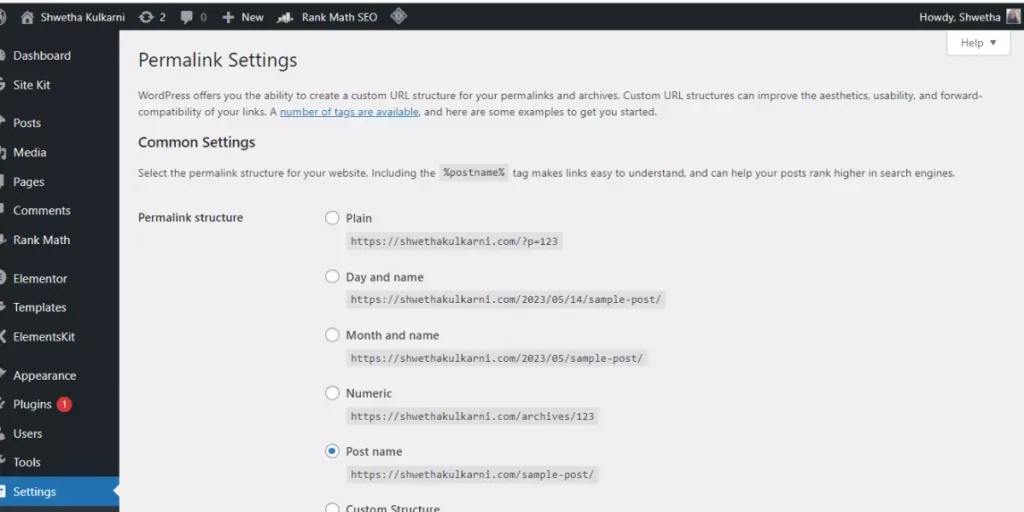
Permalink Settings
In the Permalink Settings, you can configure the URL structure of your blog posts.
You can choose from different options like date-based, post name-based, or category-based.
Important Steps After Configuring Basic Settings in WordPress
Congratulations! You have successfully configured the basic settings of your WordPress blog.
However, there is still a lot of work to do before your blog can go live and attract an audience.
In this section, I’ll will discuss the most important steps you should take after configuring the basic settings of your WordPress blog.
Choose a Theme for Your Blog
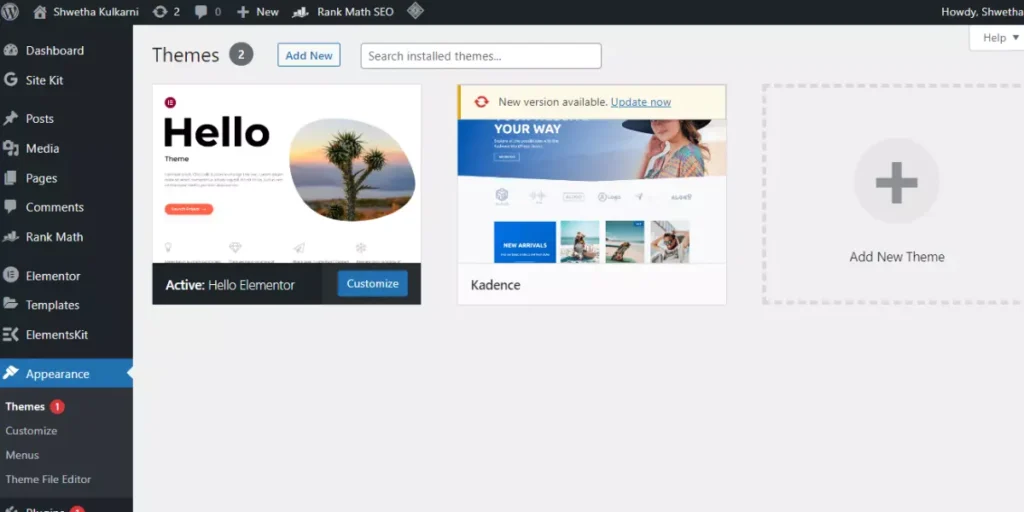
A theme is the design and layout of your WordPress blog.
It is what gives your blog its unique look and feel.
WordPress comes with a variety of themes to choose from, both free and paid. Kadence, Astra, Hello are few themes which I have personally used.
You can also purchase premium themes from third-party providers.
You can choose a theme by going to Appearance > themes in the WordPress dashboard.
When choosing a theme, make sure it is responsive and mobile-friendly, as more and more people are browsing the internet on their mobile devices.
Install Essential Plugins
Plugins are small software programs that you can install on your WordPress blog to add new features and functionality.
Some of the essential plugins that you should install on your blog include:
- Yoast SEO: This plugin will help you optimize your blog posts for search engines, improve your website’s visibility, and increase organic traffic.
- Jetpack: Jetpack is a plugin that offers a suite of powerful features for your WordPress blog, including security, performance, and marketing tools.
- WPForms: WPForms is a user-friendly form builder plugin that will help you create and add contact forms, surveys, and other forms to your blog.
To know how to install a plugin, read my article on WordPress-Install A Plugin (Beginner’s Guide)
Create Menus
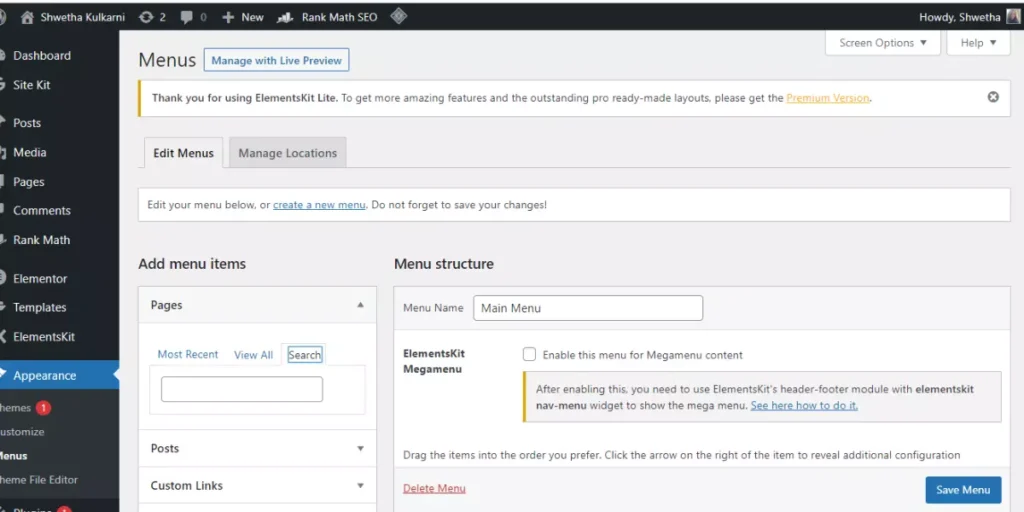
Menus allow you to organize your pages and posts into a navigation menu.
You can create a menu by going to Appearance > Menus in the WordPress dashboard.
You can add pages, posts, and custom links to your menu.
You can also drag and drop items to rearrange them.
Create Essential Pages
After installing essential plugins and creating your menus, you need to create essential pages for your blog.
Pages are different from posts in that they are not time-sensitive.
They are static pages that provide information about your blog, like an About Us or Contact page.
To create a page, go to the Pages section in the WordPress dashboard and click on Add New.
Enter your page title and content, and then publish it.
These pages include:
- About Page: This page will tell your readers who you are, what your blog is about, and what they can expect from your blog.
- Contact Page: This page will allow your readers to contact you if they have any questions, feedback, or suggestions.
- Privacy Policy Page: This page is necessary for legal compliance and tells your readers how you handle their personal information.
Customize Your Theme
Your WordPress theme determines how your blog looks and feels.
Customizing your theme can help make your blog stand out and reflect your brand.
Here are some essential theme customizations that you should consider:
- Customize Your Header: You can add your blog’s logo, change the header’s color and font, and customize the header’s navigation menu.
- Customize Your Footer: You can add widgets to your footer, change the footer’s color and font, and customize the footer’s navigation menu.
- Customize Your Homepage: You can choose how your blog posts appear on your homepage, customize your blog’s featured image size, and add or remove blog post elements like author name, date, and categories.
Create A Blog In WordPress
Now that you have set up your theme, menus, installed essential plugins, created essential pages, and customized your theme, it’s time to start writing blog posts.
To create your first post, go to the Posts section in the WordPress dashboard and click on Add New.
Enter your post title, content and any media you want to include, like images or videos.
You can also add tags and categories to organize your posts.
Once you are done, click on Publish to make your post live on your blog.
Before creating your post keyword research is very essential. Learn about top 5 free keyword research tools.
Here are some tips to help you get started:
- Choose Your Blog Post Topics: Make a list of blog post topics that you want to write about. You can use keyword research tools to find out what people are searching for in your niche.
- Create Your Blog Post Outline: Before writing your blog post, create an outline that will help you structure your post and organize your thoughts.
- Write Your Blog Post: Write your blog post based on your outline, making sure to include your keywords and optimize your post for search engines.
- Add Images and Videos: Adding images and videos to your blog posts can help make them more engaging and visually appealing.
- Proofread and Edit Your Blog Post: Make sure to proofread and edit your blog post before publishing it to ensure that it’s error-free and easy to read.
How to Add an Archive Page and a Single Post Page
If you’re using WordPress as your website platform, chances are you’re already familiar with the concept of archive pages and single post pages.
Archive pages are pages that display a list of your posts, usually sorted by date or category, while single post pages are the individual pages that display the content of each post.
While most WordPress themes come with built-in templates for these pages, sometimes they don’t quite fit your needs or aesthetic preferences.
That’s where the Elementor theme builder comes in – it allows you to create custom templates for archive pages and single post pages without having to touch a single line of code.
Prerequisites Before You Create A Blog In WordPress
Before we begin, there are a few things you’ll need:
- A self-hosted WordPress website
- The Elementor page builder plugin installed and activated
- The Elementor theme builder addon installed and activated
Adding an Archive Page
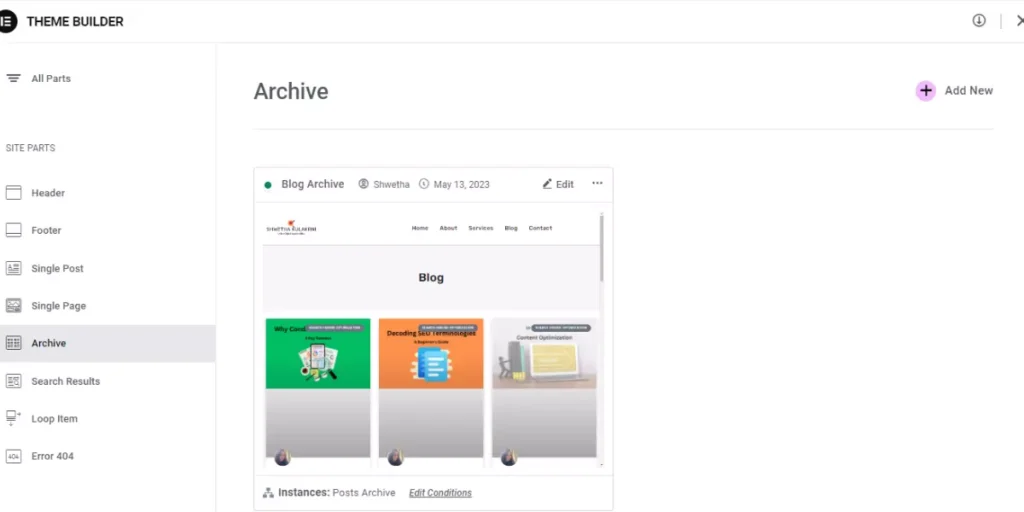
To add a custom archive page, follow these steps:
- Go to Templates > Theme Builder in your WordPress dashboard.
- Click on the “Add New” button at the top of the screen.
- Choose “Archive” from the dropdown menu and give your template a name.
- Choose the post type you want to create an archive for (e.g. posts, pages, custom post types) and click “Create Template”.
- You’ll be taken to the Elementor editor, where you can design your archive page using the drag-and-drop interface.
- When you’re done designing your page, click “Publish” to save your changes.
- Your new archive page will now be available for use on your website.
Adding a Single Post Page
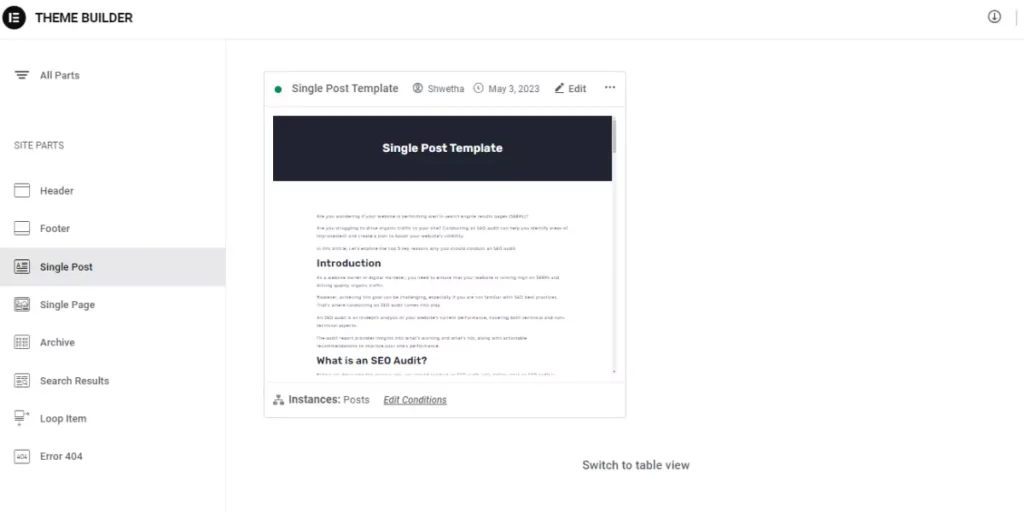
To add a custom single post page, follow these steps:
- Go to Templates > Theme Builder in your WordPress dashboard.
- Click on the “Add New” button at the top of the screen.
- Choose “Single Post” from the dropdown menu and give your template a name.
- Choose the post type you want to create a single post page for (e.g. posts, pages, custom post types) and click “Create Template”.
- You’ll be taken to the Elementor editor, where you can design your single post page using the drag-and-drop interface.
- When you’re done designing your page, click “Publish” to save your changes.
- Your new single post page will now be available for use on your website.
Other Important Terminologies To Know Before You Create A Blog In WordPress
Widgets
Widgets are small elements that can be added to your blog’s sidebar, footer, or other areas.
WordPress has built-in widgets like search, categories, and archives.
You can also install plugins to add more widgets.
To add a widget, go to Appearance > Widgets in the WordPress dashboard and drag a widget to the desired area.
Media Library
The Media Library is where you can manage all the images, videos, and other media files on your blog.
You can upload new files, organize them into folders, and edit their metadata.
To access the Media Library, go to Media in the WordPress dashboard.
Users
Users allow you to manage who has access to your blog and what they can do.
You can add new users, edit their roles and permissions, and delete users.
To manage users, go to Users in the WordPress dashboard.
Security
Security is an important aspect of running a blog.
WordPress has some built-in security features, like password-protected posts and user roles.
You can also install security plugins like Wordfence or Sucuri to enhance your blog’s security.
Backup and Restore
Backing up your blog is important in case something goes wrong.
WordPress has some built-in backup features, like exporting your content as an XML file.
You can also install backup plugins like UpdraftPlus or BackupBuddy to automate the backup process.
FAQs
Q: Can I use WordPress for free?
A: Yes, WordPress is a free and open-source platform. However, you need to pay for your domain name and hosting.
Q: Do I need coding skills to create a blog in WordPress?
A: No, you don’t need coding skills to create a blog in WordPress. It is a user-friendly platform that allows you to create and manage your blog without any coding knowledge.
Q: Can I change my blog’s theme and layout after publishing it?
A: Yes, you can change your blog’s theme and layout at any time. WordPress allows you to switch between different themes and customize them to your liking.
Q: How can I make money from my blog?
A: There are many ways to make money from your blog, like displaying ads, selling products or services, and affiliate marketing. You can also offer sponsored posts or accept donations from your readers.
Q: Can I use WordPress to create an e-commerce website?
A: Yes, you can use WordPress to create an e-commerce website by installing an e-commerce plugin like WooCommerce or Easy Digital Downloads.
Conclusion
Creating a blog in WordPress is a great way to share your thoughts and ideas with the world.
With its user-friendly interface and powerful features, WordPress makes it easy for beginners to create and manage their own blog.
By following the step-by-step tutorial outlined in this article, you can create a blog in WordPress in no time.
Remember to choose a niche, pick a domain name, and sign up for hosting.
Then, install WordPress, choose a theme, and customize your blog’s layout and design.
Finally, create your first post and start sharing your content with the world.
If you have any questions or need further assistance, feel free to explore WordPress’s extensive documentation or reach out to the WordPress community for help.
Now I would love to hear from you.
Make yourself known by leaving a comment here. I look forward to your response and welcome any other ideas as they emerge!
As a digital marketing consultant, My ultimate goal is to empower businesses to thrive in the digital landscape. I believes that a well-executed digital strategy can transform a company’s online presence, drive growth, and create meaningful connections with target audience. To Know More Click Here!

